Flee the Facility Maps Guide: Map List, Layouts, and 10-Player Tips
Learn the current map families, read a layout quickly, and choose safer Survivor or Beast routes without treating an old community blueprint as a permanent rule.
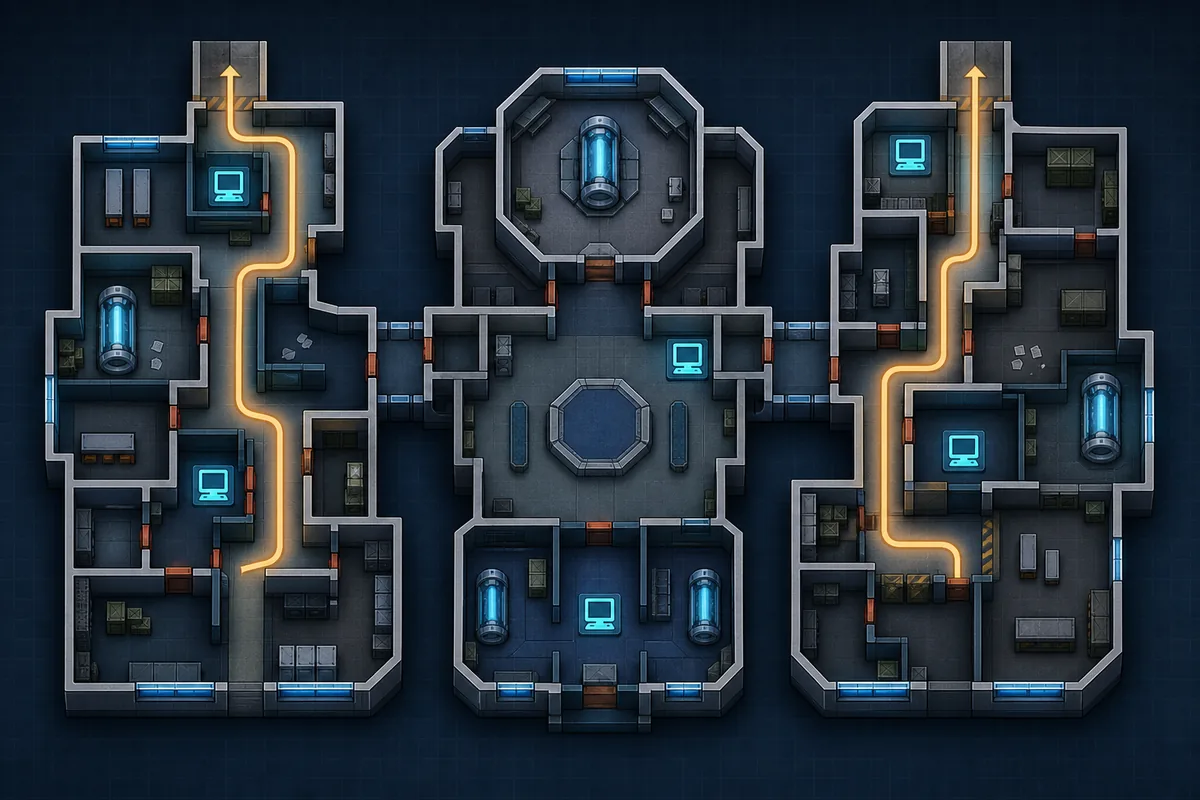
How to Learn Flee the Facility Maps
There is no single permanent blueprint that covers every Flee the Facility map or every future rework. The useful approach is to learn each map as a set of connected zones: identify a landmark, locate the nearest likely computer, and remember one window, vent, doorway, or second route before you start hacking.
For a full lobby or a 10-player round, do not assume every computer room on a community list is active. Read the round, share information, and use map size deliberately: Survivors turn distance into time, while the Beast turns predictable connections into shorter patrols.
Map-list note: Community map names, room layouts, and available rotations can change. Treat the named examples below as a learning index, then verify the current round in Roblox and the latest community reference.
Flee the Facility Maps: What to Know First
These boundaries keep a map guide useful even when a room, map name, or rotation changes.
| Map-list status | Community-maintained and subject to map additions, reworks, renames, or rotation changes |
|---|---|
| Best first landmark | A distinctive room, sign, window, vent, detector, or large connection that tells you which zone you occupy |
| Computer rule | A named computer location is a possible point, not a guarantee that it is active in the current round |
| 10-player priority | Share objective information early and plan rescues around travel time instead of checking every room in order |
| Blueprint limitation | Old videos and fan diagrams may show pre-rework geometry, removed rooms, or different detector behavior |
Flee the Facility Map List by Layout Family
A useful map list is more than a pile of names. Community references commonly group maps such as Airport, Abandoned Prison, Homestead, Library, Facility_0, Abandoned Facility, Nuclear Power Plant, and Research Facility by the way players move through them. The live game and current community documentation remain the final check for availability and exact geometry.
Use the families below as a memory system. They help you decide whether to leave a computer early, cut across a connection, or save a long route for a rescue rather than pretending that one universal route works on every map.
Compact loop maps
Maps with short connections and repeated rooms reward fast landmark recognition. Examples often described in community guides include Abandoned Prison and Library-style routes.
Learn: one safe loop, one commitment room, and the nearest rescue connection.
Wide travel maps
Airport, Homestead, and other broad layouts make distance a resource. A computer can be safe for a moment but expensive to revisit after a capture or failed skill check.
Learn: zone boundaries, exit approaches, and when to abandon a low-progress objective.
Mixed or legacy layouts
Facility_0, Abandoned Facility, Nuclear Power Plant, Research Facility, and reworked maps may combine open sightlines with narrow commitment rooms.
Learn: which connection bypasses the obvious hallway and which rooms become traps after a chase starts.
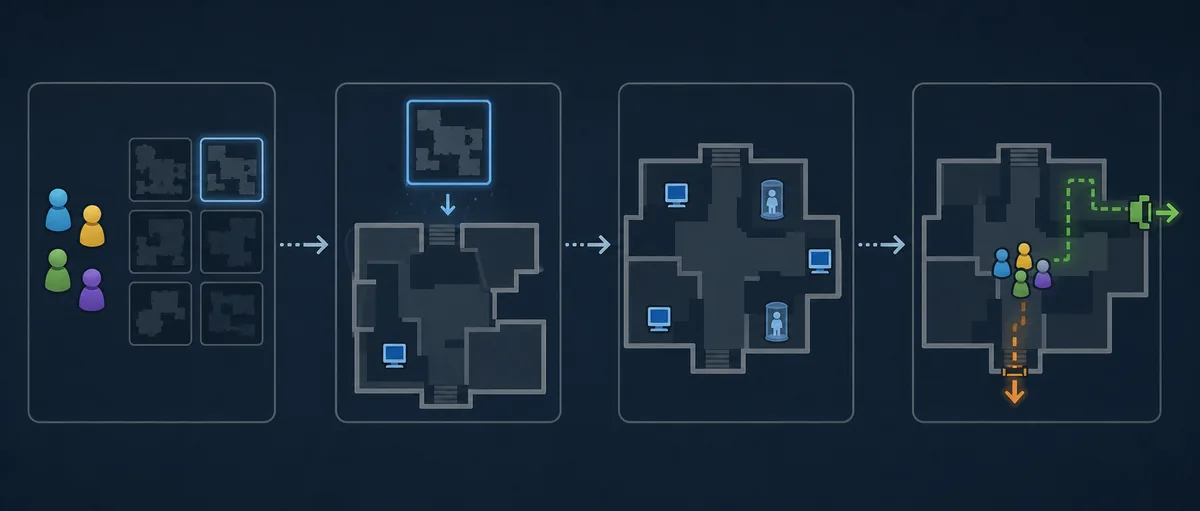
How to Read a Flee the Facility Map Layout
The phrase “map layout” is most useful when it answers a decision you will make in a round. Start with the central landmark, then trace the two connections that let you leave without crossing the same doorway twice. Mark a commitment room where a Beast can close the entrance, and mark a reset route where a Survivor can break line of sight.
For computer hunting, use a two-room check rather than a full sweep. For chasing, use the connection the other player is likely to need next. This is the core of reading a map blueprint: convert a picture into a short list of decisions.
1. Name the zone
Say the zone or landmark before you move. A shared callout reduces duplicate searches and makes a rescue plan easier to follow.
- Use a stable visual marker.
- Separate public, service, and edge areas.
- Update the callout after a major turn.
2. Link objective to escape
Before hacking, choose the nearest window, vent, doorway, or second route. The objective is only safe when you know how to leave it.
- Listen before committing.
- Do not stack the whole team in one room.
- Rotate after a failed skill check if the route is exposed.
3. Read the connection
A hallway is not automatically the best route. The next connection may give the Beast a cut-off or give a Survivor a way to break pursuit.
- Track the shortest patrol loop.
- Remember which doors create a funnel.
- Use distance for time, not for hiding forever.
10-Player Flee the Facility Maps Strategy
A 10-player lobby changes the value of distance. More players create more information, rescues, failed checks, and possible patrol signals, but they also make it easier for a team to repeat the same unsafe room. The goal is not to memorize every possible computer; it is to keep the team’s information moving.
Use the table as a role-neutral checklist. The exact objective count and active rooms depend on the round, so confirm what is actually live instead of importing a number from an old guide.
| Round situation | Survivor map decision | Beast map decision |
|---|---|---|
| Early round | Call the zone and nearest objective; avoid sending everyone to one room. | Use the first signal to identify a connection, not just the last room visited. |
| Several players active | Split checks by zone and leave a clear rescue route for the person who is captured. | Choose a pod and patrol loop that keeps two unfinished objectives within reach. |
| Long-distance rescue | Start moving before the teammate is close to a dangerous freeze stage. | Pressure the connection between rescuer and pod without standing still in one corridor. |
| Last objective | Keep exit information separate and approach a gate from cover. | Reduce empty patrols by timing the shortest route between the two exits. |
| Map rework or unfamiliar room | Use the live landmark and test the escape object before hacking deeply. | Force movement toward a known funnel instead of assuming an old blueprint is exact. |
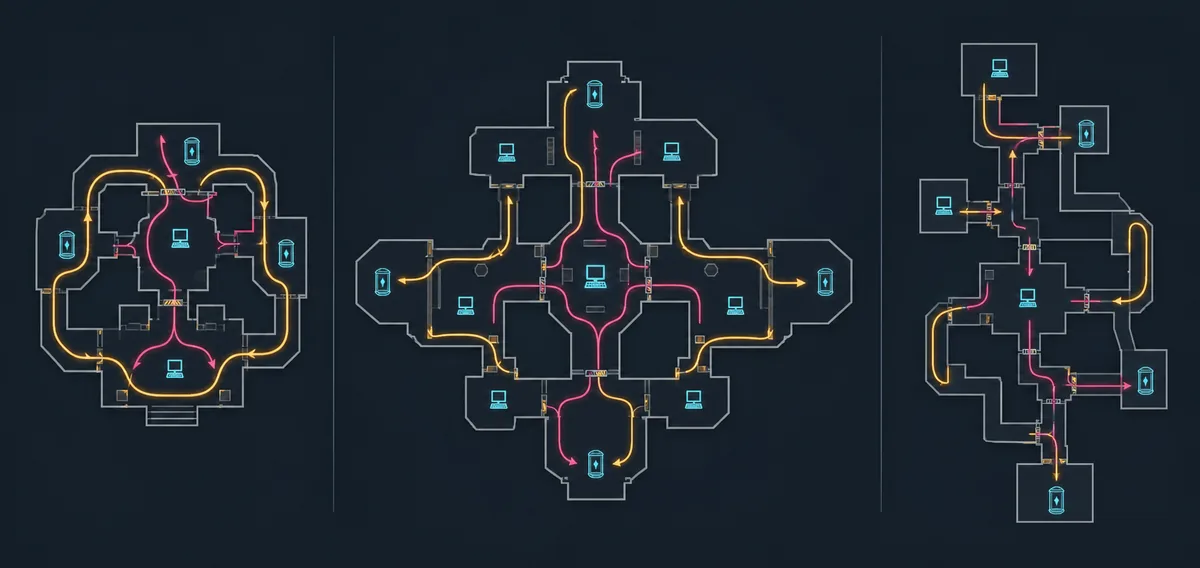
Practical Map Routes for Survivors and the Beast
The strongest map advice is a repeatable route check, not a promise that one room is always safe. Apply the appropriate sequence below to the current layout.
Survivor route
- Name the landmark or map zone as soon as you spawn.
- Check the nearest two likely computer areas instead of sweeping the whole map.
- Choose an escape object before the first hack progresses too far.
- After an error or chase, cross a zone boundary if the same room becomes predictable.
- When the final computer finishes, share exit information without grouping at the most obvious gate.
Beast patrol route
- Use failed checks, rescues, detector sounds, and movement as direction clues.
- Cut across the next connection instead of following the exact path behind a Survivor.
- Prioritize commitment rooms and unfinished objectives that fit one short patrol loop.
- Carry or pressure near a pod only when it improves control of the surrounding route.
- At endgame, time the exit approach and protect the second gate from a predictable return path.
Flee the Facility Map Layout Comparison
This comparison is a learning aid, not an official classification system. A reworked map can combine more than one family.
| Layout family | What helps Survivors | What helps the Beast | Practice focus |
|---|---|---|---|
| Compact loops | Quick rotations and short rescue paths | Fast cut-offs and strong doorway pressure | Memorize one loop and one reset route |
| Wide travel | Distance, line-of-sight breaks, and separated objectives | Predictable zone connections and pod timing | Call zones and abandon late cross-map moves |
| Corridor-heavy | A planned window or second door before hacking | Funnel control and corner pressure | Identify commitment rooms early |
| Mixed or reworked | Adapting to the live landmark instead of an old video | Using the current connection and signals | Verify what changed before trusting a blueprint |
Flee the Facility Map Mistakes to Avoid
Most map losses come from using information too late, not from failing to know every decorative room.
- Treating a community map as official and permanent. Use it for orientation, then check the current game and date of the reference.
- Checking every listed computer in order. Only some possible points are active; listen, call out, and shorten the search.
- Hacking before choosing an exit. A large-looking room can still funnel into one doorway when the Beast arrives.
- Using distance as a substitute for information. A long route buys time only when the team knows where the next connection and rescue are.
- Adding every map keyword to one page. Values, hammers, trading, scripts, and downloads have different intent and belong elsewhere or nowhere on this guide.
Flee the Facility Maps FAQ
Flee the Facility Maps Guide Summary
Learn maps as decisions: name the zone, check the likely objective, choose an escape object, and rotate when new information arrives. This method works across compact, wide, corridor-heavy, and reworked layouts without relying on one frozen blueprint.
For a 10-player round, share information early and use distance with a purpose. Survivors should turn space into time; the Beast should turn signals and predictable connections into a shorter patrol.
Sources and Editorial Notes
- Official Flee the Facility Roblox page — First-party game listing and current game context.
- Flee the Facility Wiki map reference — Community-maintained map names, history, and route references; check page dates because reworks can change details.
- Flee the Facility Community Maps credits — Developer Forum credits and community-map context.